What Is Egress Filtering?
Egress Filtering is said to be a preventive measure which controls the internal resources from making unauthorized access. It ensures that the sites which are accessible are only trusted sites. It does not just save your internal resources, but it is also helpful in decreasing the threat that our digital services have. As interacting with an infectious entity may cause damage to your server. That is why egress filtering helps in controlling and regulating any kind of data which is related to an external entity. Egress Filtering acts as a firewall. Before any outbound connection is made or is allowed, it requires to pass through the set of rules. The administrator sets these rules and filters. In other words, egress filtering is also known as outbound filtering, as it helps in keeping all the outbound infectious entities away.
It is always said that if you want to keep your server or internal resources safe, then make sure that you use the egress filtering. People may feel that egress filtering is not something very important. But they need to understand, that egress filtering is equally important in all the organizations. If you consider the safety and security of your data, your server, and other internal resources, very important, then you must use the egress filtering.
Some people disable the egress filtering by mistake and are unaware of it. But in most of the cases, the egress filtering is default disabled. And this is also one of the reasons why people are not much aware of egress filtering. Let’s get some more details related to the egress filtering.
Some Of The Best Practices of Egress Filtering
If you want to bring the egress filtering in use, there are some egress filtering practices which you need to follow.
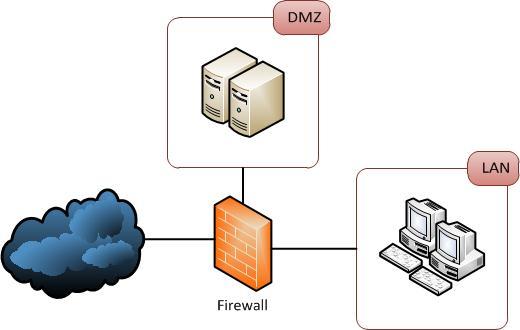
Review the sensitive networks and security zone – No matter which network you are using, as almost every network has some or the other network segments which are very sensitive. These network segments are not accessible directly. These networks have PCI zone or DMZ zone and are very important for the data entry and network, as they work as a firewall for them. That is why it is important to manage, review, and audit these firewalls or security zones just like any other firewall. There should be no gap in between their review and the same frequency for reviewing them should be allowed.
Outbound Firewall rules need to provide business justification – This means if there are any kind of outbound firewall rules or policies created, the complete business justification should also be mentioned with it. It should include everything like Why these policies were made, who will use these policies, the name of the systems or the application that manage the use of these policies, and many other such things. This will help you in knowing the exact reason behind your firewall rules. It will also help in auditing the firewall rules properly.
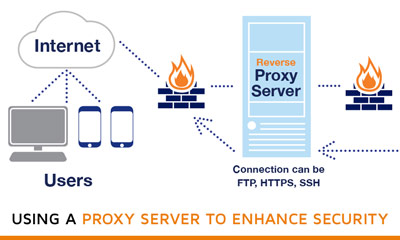
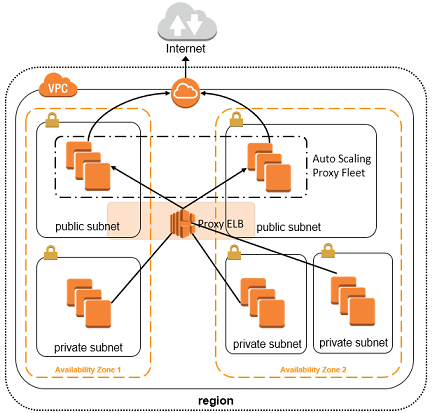
If possible, try to use a proxy – Using a proxy helps in limiting the traffic that is reaching the firewall. As your firewall will be able to accept only a few proxies, and that is why only limited traffic gets accepted by the firewall. That is why it is recommended to make use of proxy, as it will help in securing the outgoing traffic also.
These are some of the ways, you can practice the egress filtering. It will help in providing security to your network and servers.
Where one should use the egress filter
The egress filter should be deployed at the network’s edge. Most of the firewalls which are for the security of the network are placed here only. As we already mentioned above that in egress filtering everything which is there on the network needs to pass through it. So, that the firewall can check any infectious entity.
Why make use of the Egress Filtering
As we now already know, what egress filtering is and how important it is for us. We also need to know why to make use of the Egress Filtering. Just because it does not cater to all the security needs doesn’t mean that it is not very important. Unfortunately there are a lot of people with malicious intentions looking to exploit vulnerable people that are active on the internet. There are many ways that these malicious actors attempt to exploit security vulnerabilities. They go through email, networks and target specific content. One such area that receives a lot of focus is adult sites. Scammers and hackers know that users accessing porn sites and adult dating sites are not always vigilant or secure. While sex sites like https://Meetnfuck.app advise their fuckbuddy seeking members about online safety, most adult dating apps don’t offer information about security to their members, let alone egress filtering. The reality is, is this is a large corner of the internet and security and privacy should be prioritized. Knowing about why to make use of the egress filtering, will also help us in understanding its importance in a better way.
- Helps in blocking the unwanted services – There are many types of unwanted service available on the internet these days. If the users do not want to make use of any of these unwanted services, the egress filter is very helpful in doing that. It blocks the protocols and ports so that one cannot access those services. Like if there is any gaming site or service on the internet and if you do not want your kid to use it, you can use egress filtering for blocking it or limiting the service.
- Saves your system from attacks – Egress filtering not just acts as a firewall, but it also good for other things. Like it helps in protecting your system from different attacks like malware hosting, DDoS Attacks, Botnets, and Spamming. It helps in blocking the different types of traffic so that it can save your system from such threats.
- Helps in Disrupting Malware – If your system is infected with malware, the egress filtering can help in disrupting it. It stops your infected system from getting connected to malware’s command server. Also, the egress filter stops and prevents the malware in exporting any of the internal or machine data to its destination. This helps in saving your system from leakage of any of your digital data which could have been a big loss for you.
- Helps in making one aware of the network traffic – If you are using the egress filter, it will help you in becoming aware of your network and the unauthorized access or activity on your network. If the machine or the system will try making unauthorized connections, you will get the alerts, with the help of the egress filter.